Django form customization using Crispy Forms
September 21, 2014
At Dreamsolution we regularly use Crispy Forms to generate complex forms in Django. I want to share some practical customization examples with Crispy Forms using the formhelper API.
At Dreamsolution we regularly use Crispy Forms to generate complex forms in Django. I want to share some practical customization examples with Crispy Forms using the formhelper API. The examples are how to:- create Fieldsets
- wrap fields together
- insert HTML between fields
Create Fieldsets
In Crispy forms you can define a layout and structure the fields using the Fieldset layout object. However this means you have to add every field you want in the Fieldset layout object, and this can become a long list:
    Layout(
        Fieldset(
            'Your legend',
            'first_name',
            'last_name',
            'street',
            'house_number',
            'addition',
            'zip_code',
            'city'
        )
    )
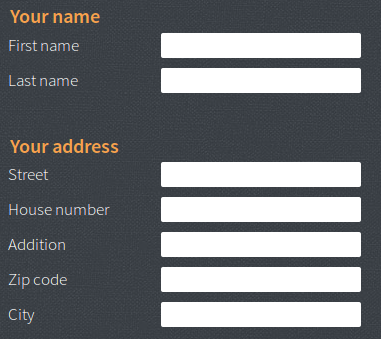
There is another way to create fieldsets and or manipulate the layout structure. You can use the API from the formhelper instance. In the example below we use the formhelper API to slice the layout into fieldsets. We wrap the first 2 fields in a fieldset and the rest goes in the second fieldset:
    self.helper = FormHelper(form=self)

    self.helper[0:2].wrap_together(layout.Fieldset, 'Your name')
    self.helper[1:6].wrap_together(layout.Fieldset, 'Your Address')
As you can see we only need 2 lines of code to create two fieldsets.
Wrap fields together
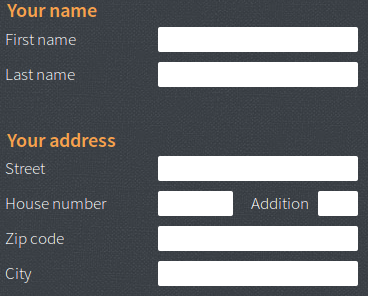
Let's say you want to display 2 fields on 1 line, for example: house number and addition. In this example we create a wrapper div around the 2 fields and assign an extra class for each field to be able to style the two fields the way we want:
    self.helper[3:5].wrap_together(layout.Div, css_class="housenumber-wrapper")
    self.helper['house_number'].wrap(layout.Field, wrapper_class="housenumber")
    self.helper['addition'].wrap(layout.Field, wrapper_class="addition")

Now you can style and manipulate the 2 fields without touching the other fields. However there are three things you need to be aware of:
- If you want to manipulate the layout of the fields and also want to create fieldsets, first do the manipulation.
-
When you use the API to create a fieldset, it changes the field order structure.
For example, the fields "first_name" and "last_name" are in the first fieldset. This changes fields order position into:
0: Fieldset
1: street
2: house_number
3: addition
etc...
To fetch "addition" you target to 3 instead of 4 (its position in the original field order). - If you want to insert extra content between fields you do this after the fieldsets are created.
Insert HTML between fields
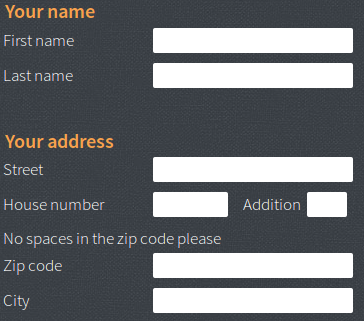
There are cases you want to add extra information between the fields. You can do this by using the insert option. In this example we add extra information above the "zipcode" field. Note that we look up the second layout and the field precedent to "zipcode". Because in the first step we created 2 fieldsets:
    self.helper.layout[1].insert(2,layout.HTML(
      '<p>No spaces in the zipcode, please.</p>'
    ))
The complete code with all the examples in the right order:
    # Wrapping the fields "housenumber and addition". Assign extra class to the fields
    self.helper[3:5].wrap_together(layout.Div, css_class="housenumber-wrapper")
    self.helper['house_number'].wrap(layout.Field, wrapper_class="housenumber")
    self.helper['addition'].wrap(layout.Field, wrapper_class="addition")

    # Create 2 field sets
    self.helper[0:2].wrap_together(layout.Fieldset, 'Your name')
    self.helper[1:6].wrap_together(layout.Fieldset, 'Your Address')

    # not insert text above "zipcode"
    self.helper.layout[1].insert(2,layout.HTML(
      '<p>No spaces in the zipcode, please.</p>'
    ))